Canning Homemade Meatloaf is a smart, old-fashioned way to preserve hearty comfort food so you can enjoy it anytime without freezing. This method is especially popular for long-term food storage, pantry meals, homestead cooking, and emergency preparedness. When done correctly using a pressure canner, canned meatloaf stays tender, flavorful, and ready to heat and serve straight from the jar.
Below is a detailed, step-by-step guide to safely pressure-can meatloaf while maintaining great texture and rich, homemade taste.
Ingredients
Before you begin, gather all ingredients and equipment. Proper measurements are important for food safety, pressure canning success, and consistent flavor.
| Ingredient | Quantity | Notes |
|---|---|---|
| Ground beef (hamburg) | 10 lbs | Use fresh, lean beef for best results |
| Garlic cloves | 3 | Do not exceed—garlic intensifies during canning |
| Onion | ½ | Finely chopped |
| Light brown sugar | 2–3 tbsp | Balances acidity |
| Tomato ketchup | 1¼ cups | Adds flavor and moisture |
| Saltine crackers | 1 plastic package | Crushed finely |
| Parsley | 1 tbsp | Dried or fresh |
| Yellow mustard (powder) | 1 tsp | Adds depth |
| Black pepper | 1 tsp | Adjust to taste |
| Salt | 2 tsp | Essential for flavor |
| Eggs | 8 | Acts as a binder |
Instructions
Follow each step carefully to ensure your pressure-canned meatloaf is both safe and delicious. This method is approved for meat-based canning when processed correctly.
1. Prepare Jars and Lid
Wash jars, lids, and bands in hot, soapy water.
Keep jars hot until ready to fill.
Place lids in hot (not boiling) water to soften the sealing compound.
2. Mix the Meatloaf
In a large bowl, combine ground beef, crushed crackers, eggs, onion, garlic, ketchup, brown sugar, parsley, mustard powder, salt, and pepper.
Mix thoroughly by hand until evenly combined, but do not overmix.
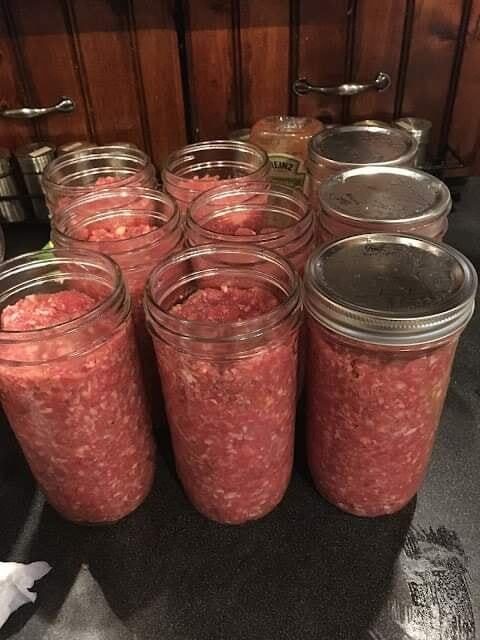
3. Pack the Jars
Pack raw meatloaf mixture firmly into jars.
Press gently to remove air pockets, but do not add liquid.
Leave 1¼ inches of headspace, which is critical for pressure canning meat.
4. Clean the Rims
Wipe jar rims with a clean, damp cloth to remove any grease or residue.
Place lids on jars and apply bands finger-tight only—do not overtighten.
5. Load the Pressure Canner
Place jars into the pressure canner using the rack.
Add cold water according to your canner’s instructions (usually 2–3 inches).
Close the lid and heat on high without the weight.
6. Vent Steam Properly
Allow steam to vent steadily for 10 full minutes.
This step removes air from the canner and ensures safe internal temperature.
After venting, place the weight on the vent.
7. Process the Meatloaf
Bring the canner to 10 PSI pressure (adjust for altitude if needed).
Once pressure is reached, start timing.
Process jars for 90 minutes, maintaining steady pressure throughout.
8. Cool Naturally
Turn off heat and allow the canner to cool naturally.
Do not remove the weight or open the lid prematurely.
Let jars remain undisturbed for 12–24 hours.
9. Check Seals
Remove bands and test each lid by lifting the jar gently by the lid.
A properly sealed lid will be concave and firmly attached.
Any unsealed jars should be refrigerated and used within 2 weeks.
10. Storage & Serving Tips
Store sealed jars in a cool, dark, dry place for up to 1 year.
When ready to eat, warm the jar in hot water or microwave to loosen contents.
Juices may gel—this is normal for canned meat products.